🛢️ Database (JDBC) Connector
How to configure your JDBC connector for fetching users and access data from any database
How the JDBC Connector Works
The JDBC connector lets you integrate Lumos with any database by defining SQL queries for each capability. Each capability (a specific action like listing accounts or assigning entitlements) maps to a single SQL query that you write directly in the Lumos UI.
- Read capabilities use
SELECTstatements. The column labels in your query results must match specific naming requirements documented below for each capability. - Write capabilities use
INSERT,UPDATE, orDELETEstatements to modify data in your database. - Stored procedures are supported for both read and write capabilities.
- All field values should be selected as strings unless otherwise noted.
Minimum Required Capabilities
To set up a working JDBC connector, you must define SQL queries for at least two capabilities:
- Validate Credentials — Confirms that the database connection and credentials are working.
- List Accounts — Retrieves the list of user accounts from your database.
Completing additional capabilities unlocks more functionality in Lumos, such as incremental syncing, entitlement management, activity tracking, and automated provisioning/deprovisioning.
Templated Fields
For certain capabilities, Lumos provides runtime values that you can reference in your SQL queries using curly bracket syntax: {field_name}. When Lumos executes your query, it replaces these placeholders with the actual values.
For example, the Get Account capability provides an account_id field. You can reference it in your query like this:
SELECT * FROM accounts WHERE id = {account_id};The List Updated Accounts capability provides a since field containing a DATETIME-equivalent value representing the last time Lumos ran an incremental sync. You can use it to filter for recently changed records:
SELECT * FROM accounts WHERE updated_at > {since};Write capabilities also use templated fields. Lumos makes specific field values available for each write capability (documented below), and you reference them the same way:
UPDATE accounts SET status = 'ACTIVE' WHERE external_id = {account_id};All templated field values are strings unless otherwise noted. The available fields for each capability are listed in the sections below.
For write queries containing DDL (creating or altering users/tables) the parameterization syntax requires that identifiers that should not be contained within quotes are suffixed with an
!. In the example below, the parametersidneed to have an!after them to work correctly because they are identifiers that should not be quoted in the SQL DDL statement. In the exampledistinguished_nameshould be passed as a string literal in the query so it should not have the!suffixCreate Account Example:
CREATE USER {email!} IDENTIFIED BY TempPass123 PASSWORD EXPIREUpdate Account Example:
ALTER USER {id!} IDENTIFIED EXTERNALLY AS {distinguished_name}
1.Set Up On-Premise Agent
If not previously completed, follow detailed instructions outlined in: Installation section.
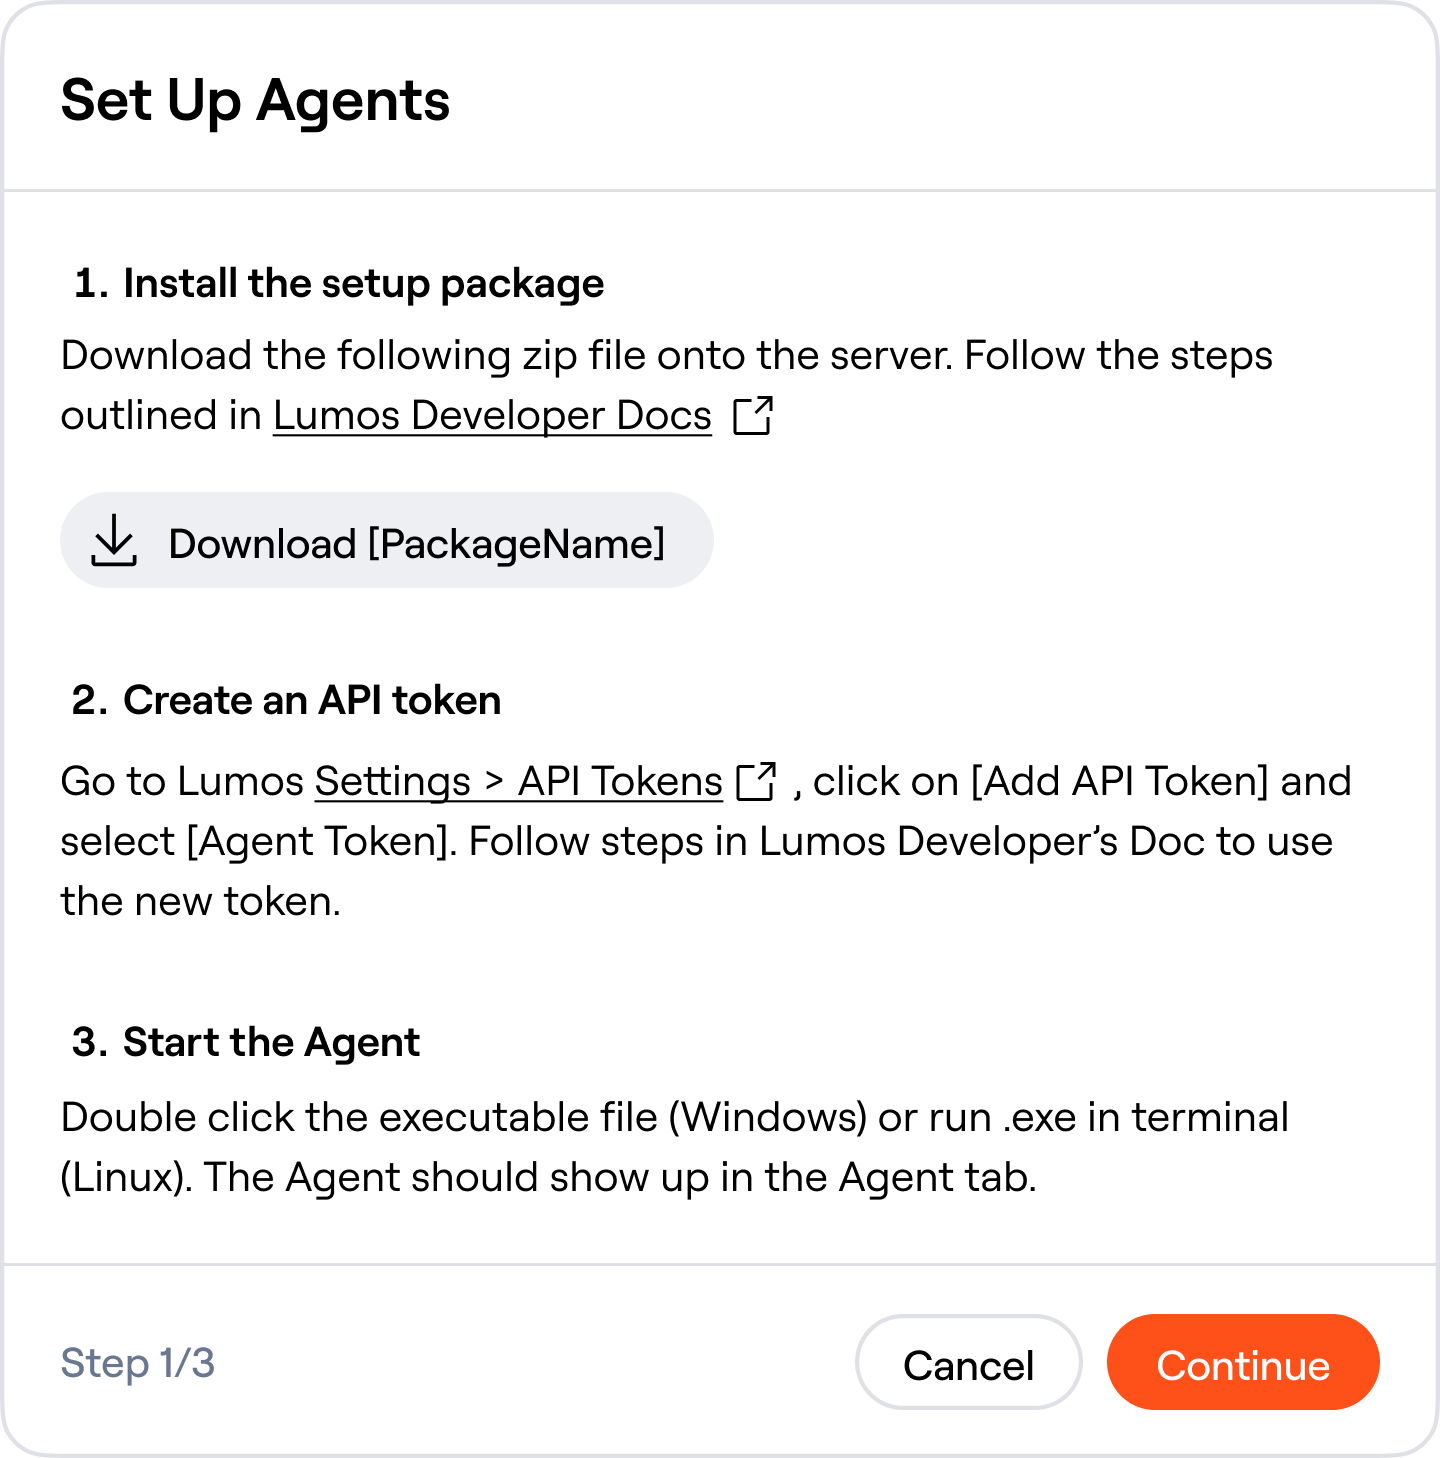
Agent Instructions
2.Download JDBC Connector Packages
Download the relevant zip file containing the appropriate connector packages and JDBC drivers.
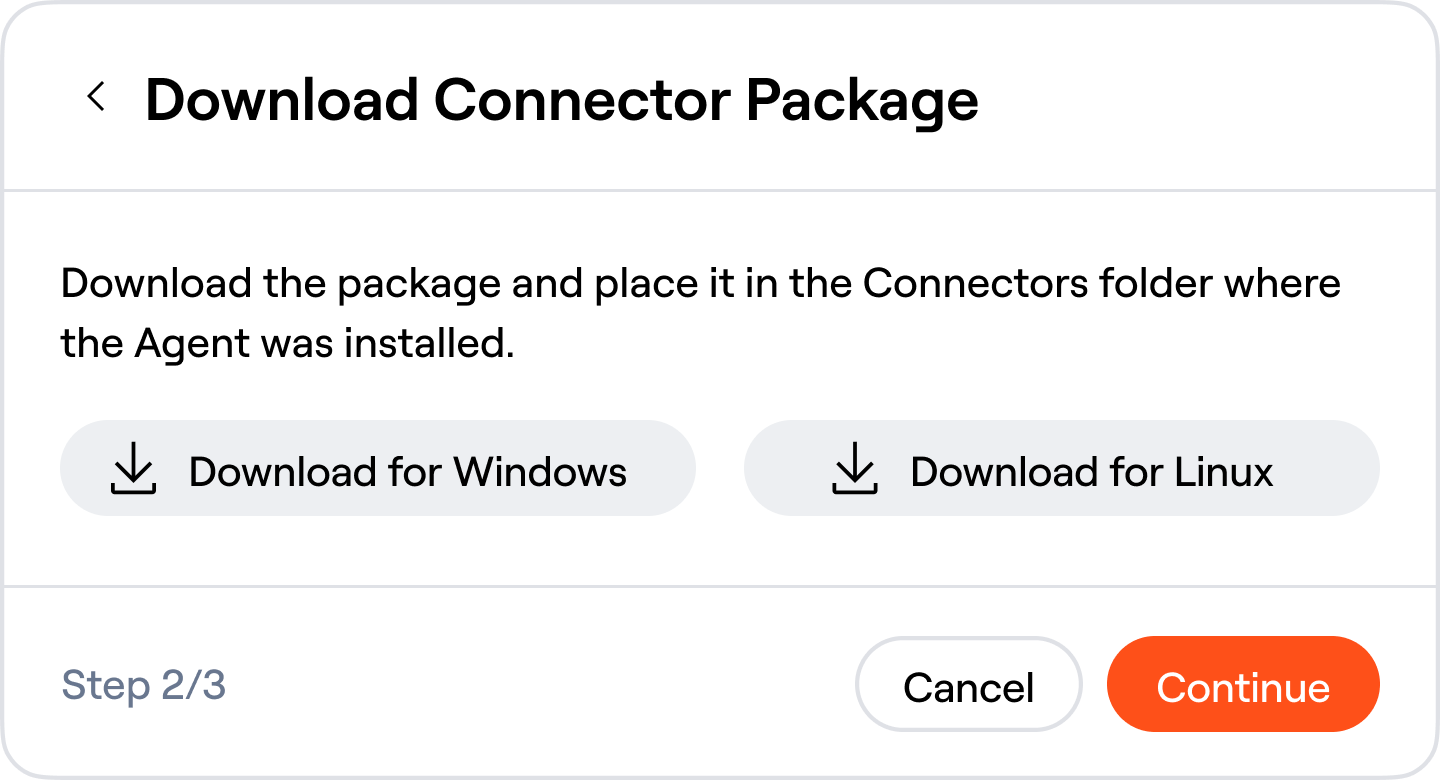
Connector Package Instructions
3. Configure database user
Set up a database user that has the appropriate read and/or write access to the database from the server set up for your agent. The access required for your service account will be determined by the SQL queries that you define for each capability under your Authentication Details.
Authentication MethodLumos only supports authentication to a database via a database user with a username and password. Lumos does not support authentication methods such as Windows Authentication, Certificate-Based Authentication, IAM-Based Authentication, etc.
4. Configure Lumos Agent access to the DB server
In order for the JDBC connector to work, the machine hosting your Lumos Agent must have access to the database server over the network. In order to validate this, install a client for your database server on the Lumos Agent machine. Then, using the credentials configured for your database user, test that you are able to connect to the server and execute queries.
In addition, if you are using the Windows version of the Lumos On Premise Agent, you must make sure that the windows machine has a version of Java installed that is greater than or equal to Java 11. To validate this, open powershell and run
java - versionThe version number will be displayed in the ouput. If you need to install java, distributions of OpenJDK from Microsoft can be found here https://learn.microsoft.com/en-us/java/openjdk/download
5. Enter Authentication Details
Configure the appropriate authentication details in the following sections.
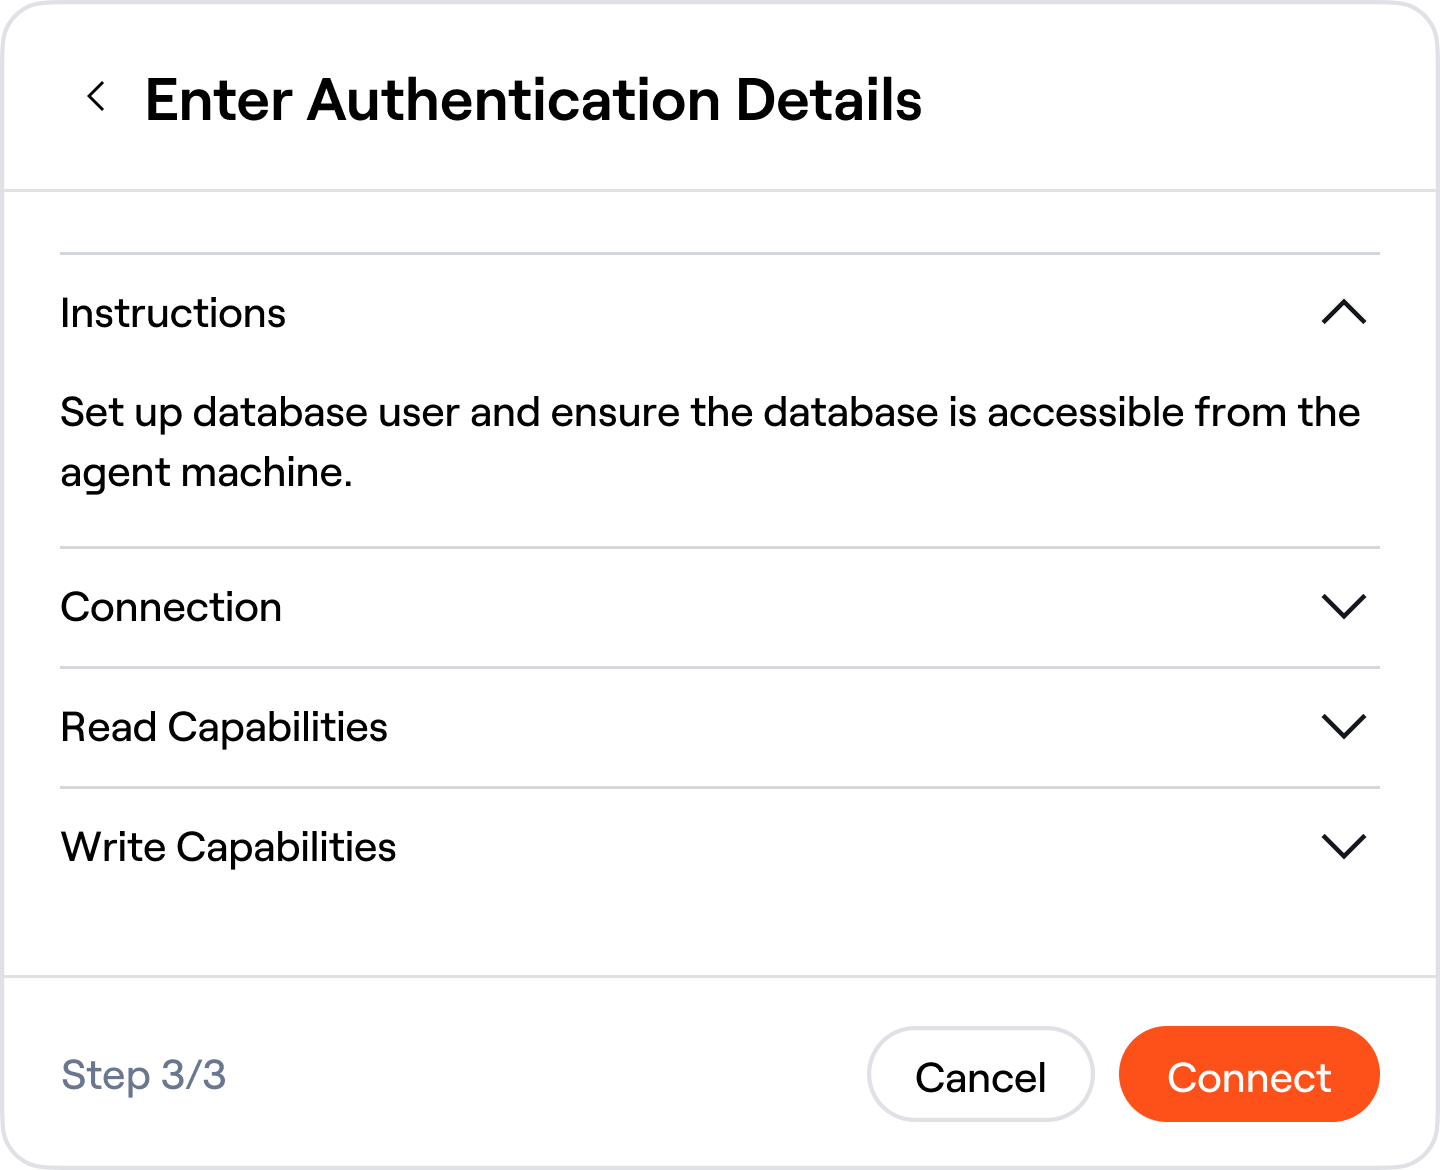
Authentication Details
Connection Details
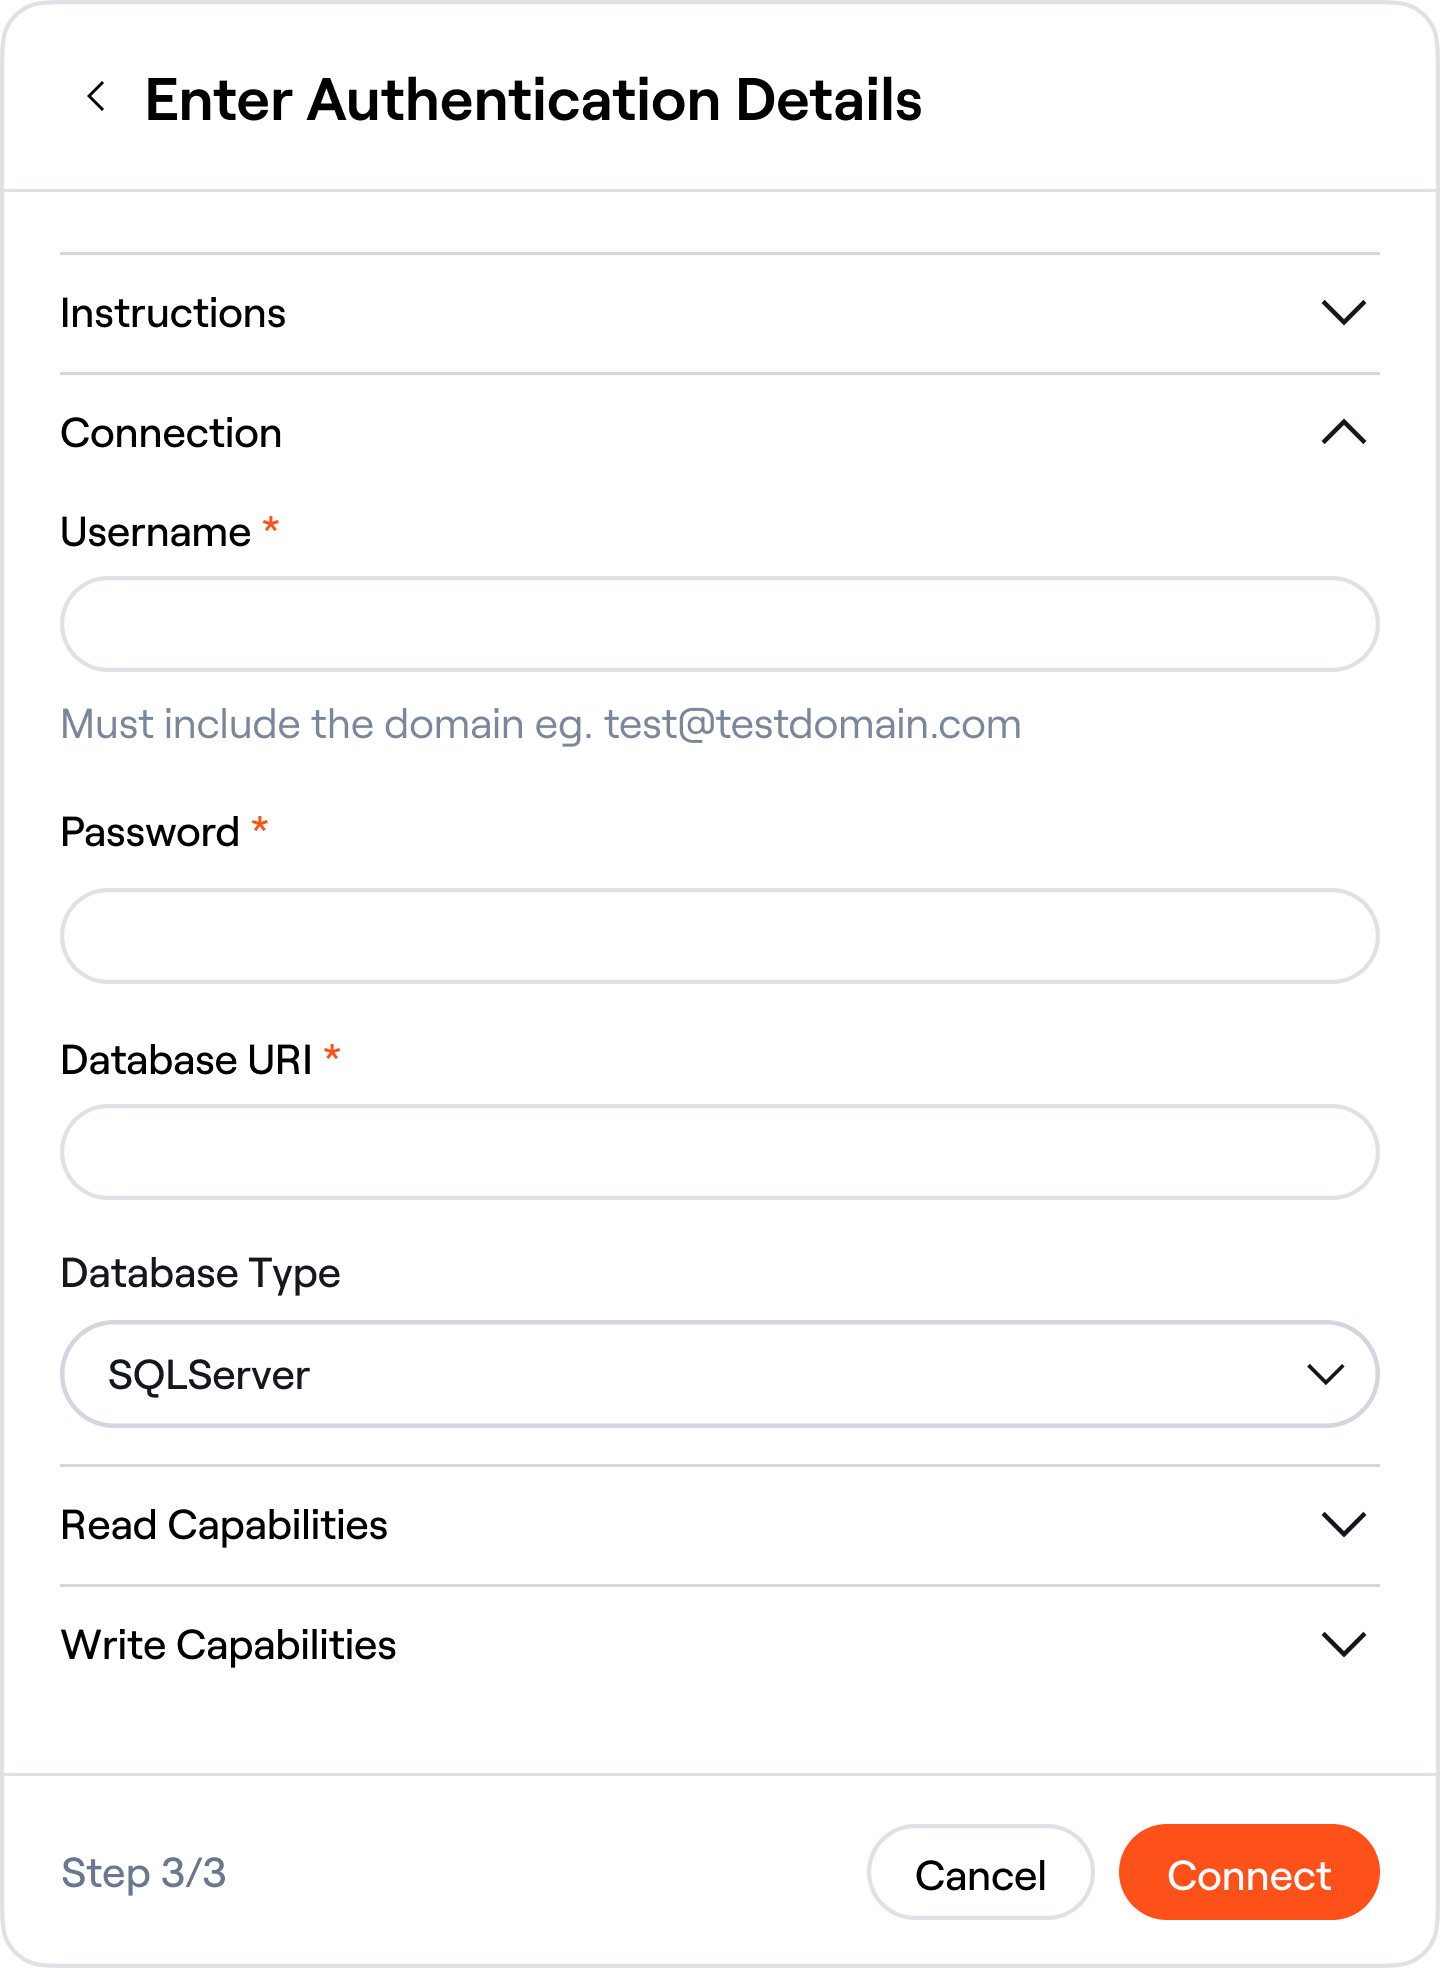
Provide the authentication fields:
i. Username
ii. Password
iii. Database URI:
The database URI should be in JDBC format, excluding the username and password. ex:jdbc:postgresql://db.server:5430/a_database?ssl=true&loglevel=2
iv. Database Type
Connection Details
Defining Read Capabilities
- Define a SQL query for the relevant read capabilities.
- The SQL query needs to be a SELECT statement.
- Each read capability has specific column label naming requirements as detailed in the next section.
- example sql query "SELECT external_id as integration_specific_id, email_address as email, uname as username FROM my_user_table;"
- All fields should be selected as strings unless otherwise noted
- Calling stored procedures as part of the SQL query is supported.
Column Label Naming Requirements for Read Capabilities
The following read capabilities are described in detail in Connector capabilities.
Validate Credentials
This query should be the same as the query for ListAccounts, but limited to one record. Include any custom attributes, as this query is used to detect the custom attribute schema.
SELECT id AS integration_specific_id, email, first_name AS given_name,
       last_name AS family_name, uname AS username, status AS user_status
FROM users LIMIT 1;
List Accounts
| Field | Required | Notes |
|---|---|---|
integration_specific_id | Yes | |
email | No | |
given_name | No | |
family_name | No | |
username | No | |
user_status | No | One of ACTIVE, INACTIVE, SUSPENDED, DEPROVISIONED, PENDING, DELETED |
account_type | No | One of SERVICE, USER |
Any additional fields selected will be considered custom attributes. Select them with the column name you want to show up in the Source of Truth settings within Lumos.
SELECT id AS integration_specific_id, email, first_name AS given_name,
       department, title
       last_name AS family_name, uname AS username,
       -- Convert boolean column to the expected status enum
       CASE WHEN active = true THEN 'ACTIVE' ELSE 'INACTIVE' END AS user_status,
       department, title
FROM users;
Get Account
| Field | Required | Notes |
|---|---|---|
integration_specific_id | Yes | |
email | No | |
given_name | No | |
family_name | No | |
username | No | |
user_status | No | One of ACTIVE, INACTIVE, SUSPENDED, DEPROVISIONED, PENDING, DELETED |
account_type | No | One of SERVICE, USER |
Any additional fields selected will be considered custom attributes. Select them with the column name you want to show up in the Source of Truth settings within Lumos.
The field account_id is available to be used as {account_id} within the Get Account query.
SELECT id AS integration_specific_id, email, first_name AS given_name,
       last_name AS family_name, uname AS username, status AS user_status
FROM users WHERE id = {account_id};
List Updated Accounts (For Incremental Syncs)
| Field | Required | Notes |
|---|---|---|
integration_specific_id | Yes | |
email | No | |
given_name | No | |
family_name | No | |
username | No | |
user_status | No | One of ACTIVE, INACTIVE, SUSPENDED, DEPROVISIONED, PENDING, DELETED |
account_type | No | One of SERVICE, USER |
The field since is available to be used as {since} within the List Updated Accounts query. For example: SELECT * FROM accounts where updated_at > {since};. The value of since will be a DATETIME equivalent value for the DB engine you are using and represents the last incremental sync done by Lumos. This means the value can be compared directly to DATETIME equivalent columns in a SQL statement.
SELECT id AS integration_specific_id, email, first_name AS given_name,
       last_name AS family_name, uname AS username, status AS user_status
FROM users WHERE updated_at > {since};
Find Entitlements Association
| Field | Required | Notes |
|---|---|---|
account_id | Yes | |
integration_specific_entitlement_id | Yes | Can be selected as integ_specific_entitlement_id if using a DB engine that limits identifiers to 30 characters |
integration_specific_resource_id | Yes | Can be selected as integ_specific_resource_id if using a DB engine that limits identifiers to 30 characters. Can be selected as an empty string if the entitlement is not for a resource |
SELECT user_id AS account_id, entitlement_id AS integration_specific_entitlement_id,
       resource_id AS integration_specific_resource_id
FROM user_entitlements;
Get Last Activity
| Field | Required | Notes |
|---|---|---|
account_id | Yes | |
event_type | Yes | |
happened_at | Yes |
SELECT user_id AS account_id, activity_type AS event_type, activity_date AS happened_at
FROM activity_log;
List Entitlements
| Field | Required | Notes |
|---|---|---|
entitlement_type | Yes | |
integration_specific_id | Yes | |
integration_specific_resource_id | Yes | Can be selected as an empty string if the entitlement is not for a resource |
is_assignable | No | Boolean |
label | Yes | |
description | No |
SELECT type AS entitlement_type, id AS integration_specific_id,
       resource_id AS integration_specific_resource_id, assignable AS is_assignable,
       name AS label, description
FROM entitlements;
List Resources
| Field | Required | Notes |
|---|---|---|
integration_specific_id | Yes | |
label | Yes | |
resource_type | Yes |
SELECT id AS integration_specific_id, name AS label, type AS resource_type
FROM resources;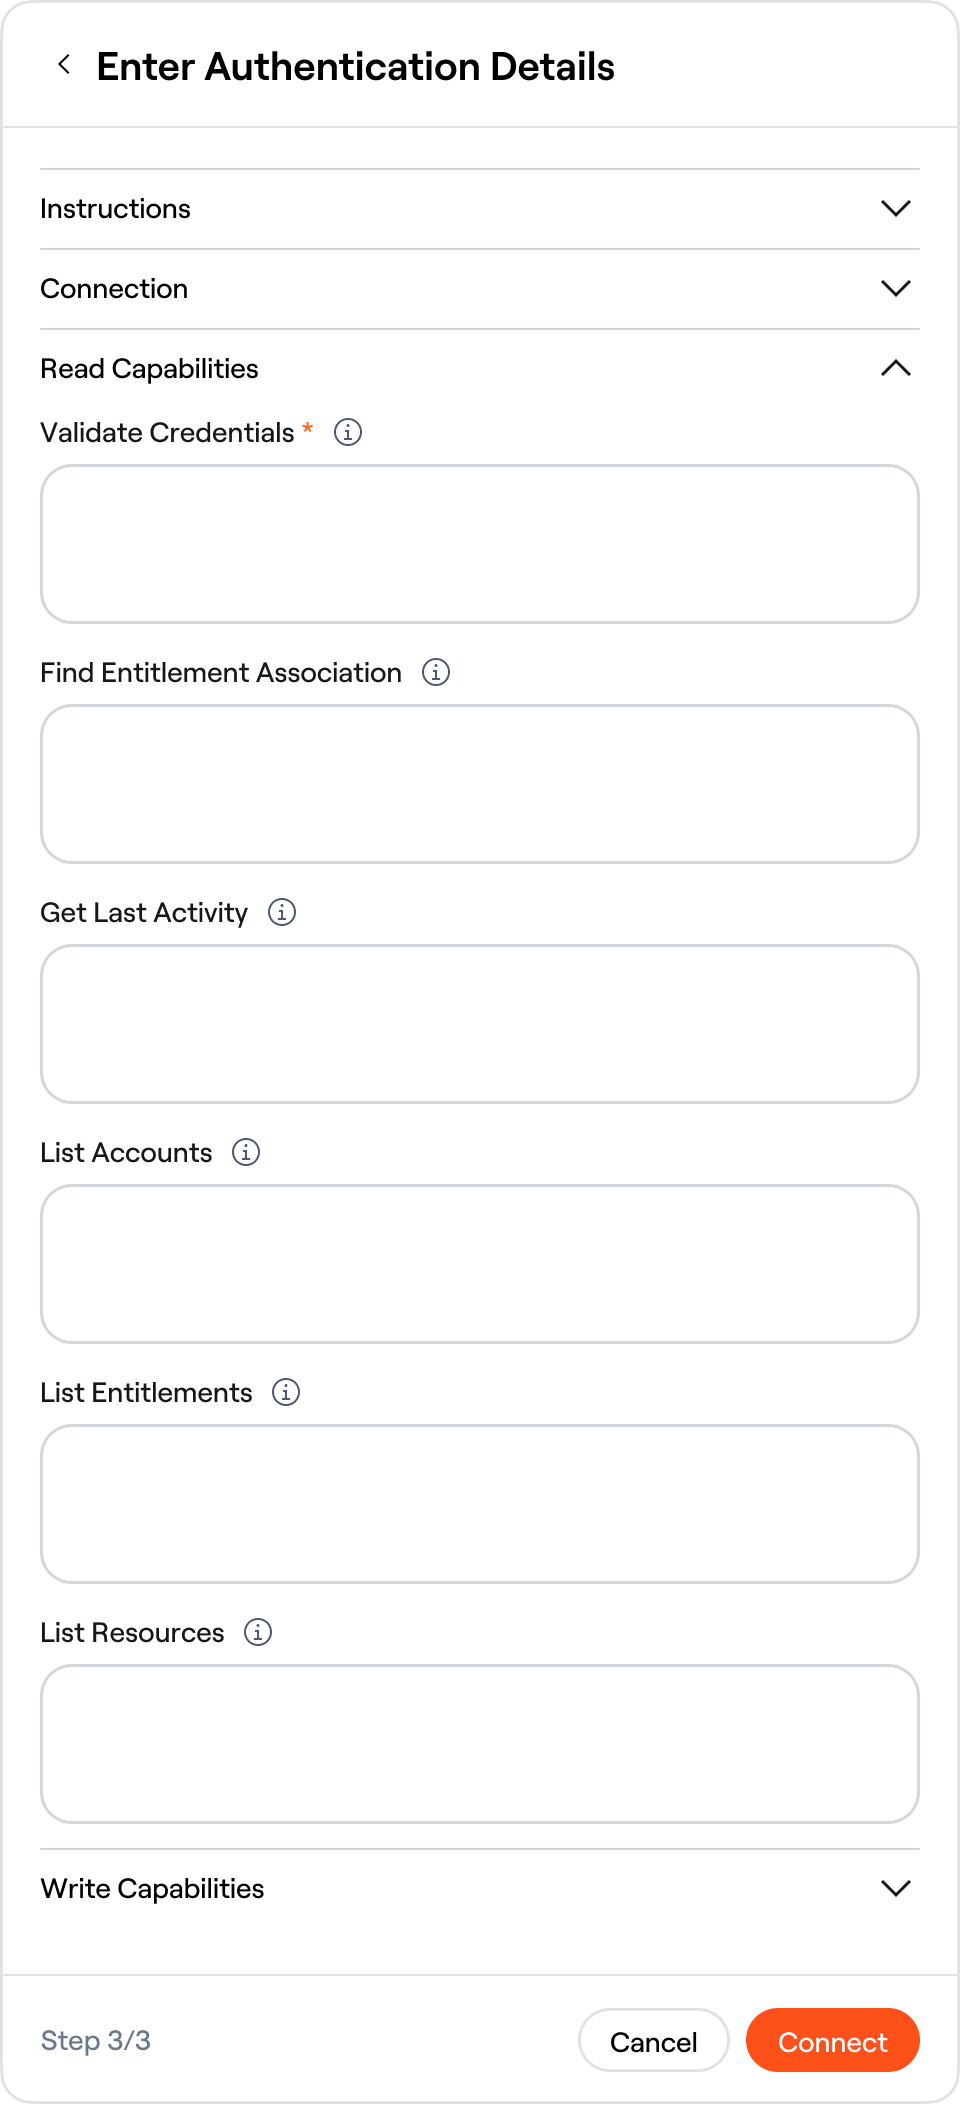
SQL Query for Read Capabilities
Defining Write Capabilities
- Define a SQL query for the relevant write capabilities.
- Each write capability has specific requirements in defining the SQL Query.
- An example sql query "UPDATE accounts SET status='ACTIVE' WHERE external_id = {account_id}"
- The field names detailed in the next section will be made available to the query and should be included in the INSERT or UPDATE enclosed within curly brackets.
- All values will be strings unless otherwise noted
- If a write capability contains multiple statements, it should be wrapped in the transaction.
- Calling stored procedures as part of the SQL query is supported.
Column Label Naming Requirements for Write Capabilities
The following write capabilities are described in detail in Connector capabilities. See Templated Fields for how to reference Lumos-provided values in your SQL queries.
Active Account
| Field | Required | Notes |
|---|---|---|
account_id | Yes |
UPDATE users SET status = 'ACTIVE' WHERE id = {account_id};Assign Entitlement
| Field | Required | Notes |
|---|---|---|
account_integration_specific_id | Yes | |
resource_integration_specific_id | Yes | |
resource_type | Yes | |
entitlement_type | Yes | |
entitlement_integration_specific_id | Yes |
INSERT INTO user_entitlements (user_id, resource_id, resource_type, entitlement_type, entitlement_id)
VALUES ({account_integration_specific_id}, {resource_integration_specific_id},
        {resource_type}, {entitlement_type}, {entitlement_integration_specific_id});
Create Account
| Field | Required | Notes |
|---|---|---|
email | Yes | |
username | Yes | |
given_name | Yes | |
family_name | Yes | |
user_status | Yes | One of ACTIVE, INACTIVE, SUSPENDED, DEPROVISIONED, PENDING, DELETED |
INSERT INTO users (email, username, first_name, last_name, status)
VALUES ({email}, USERNAME, {given_name}, {family_name}, USER_STATUS);
Returning the ID of the created accountIn order for Lumos to identify the account created, this query should return the id of the account. This can be done by making your Create Account query return a column with the name "id". If this is not an option with your DB/schema, you can also fill out the Create Account Return ID query. This query should select a single column "id" and return the id of the account created. This query will be executed within the same transaction as the Create Account query and can contain the same parameters Lumos provides to the Create Account query. For example, if your accounts have a unique email, an appropriate Create Account Return ID query would be
SELECT id FROM accounts WHERE email = {email};
Update Account
For the query to update an account, the only standard field is id every other field will be configured in Lumos. This allows you to use any placeholder you would like within the query and match it when configuring the Update Account capability in Lumos.
| Field | Required | Notes |
|---|---|---|
id | Yes | |
| Any custom attribute placeholder | No | ex. SAMAccountName, external_identifier, email |
UPDATE users SET sam_account_name = {SAMAccountName}, email = {email} WHERE id = {id};Deactivate Account
| Field | Required | Notes |
|---|---|---|
account_id | Yes |
UPDATE users SET status = 'INACTIVE' WHERE id = {account_id};Delete Account
| Field | Required | Notes |
|---|---|---|
account_id | Yes |
Unassign Entitlement
| Field | Required | Notes |
|---|---|---|
account_integration_specific_id | Yes | |
resource_type | Yes | |
resource_integration_specific_id | Yes | |
entitlement_type | Yes | |
entitlement_integration_specific_id | Yes |
DELETE FROM user_entitlements
WHERE user_id = {account_integration_specific_id}
  AND resource_type = {resource_type}
  AND resource_id = {resource_integration_specific_id}
  AND entitlement_type = {entitlement_type}
  AND entitlement_id = {entitlement_integration_specific_id};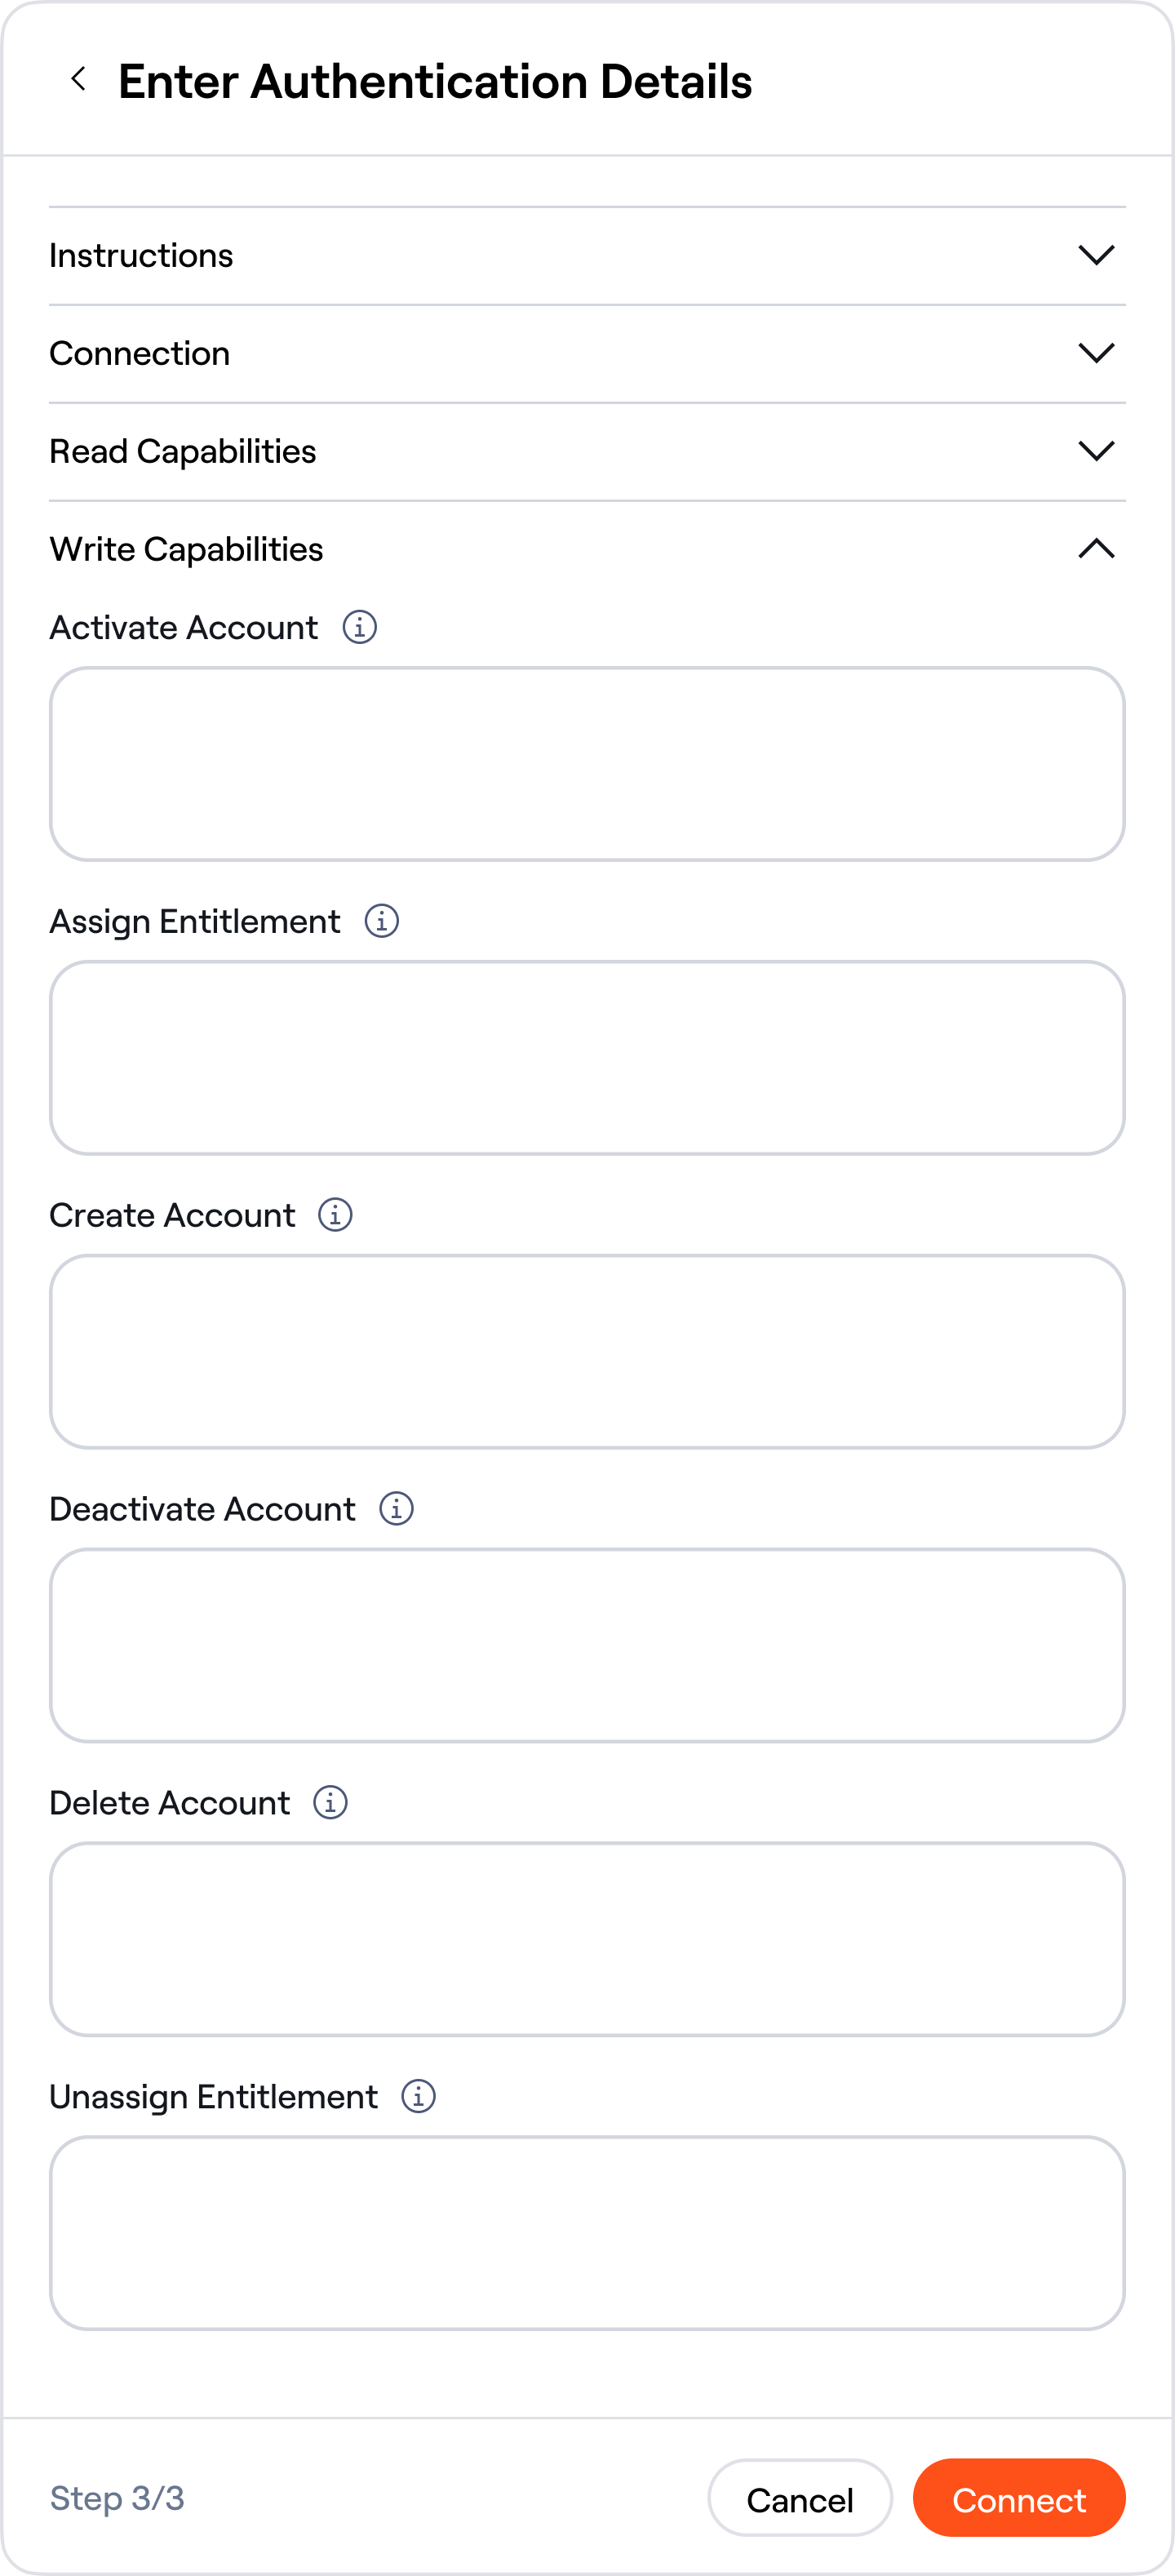
SQL Query for Write Capabilities
Troubleshooting
Out of memory errors
If you are encountering issues when syncing your JDBC connector and see a java.lang.OutOfMemoryError in Lumos or in your Agent logs. You will need to increase the heap memory limit for the Java Virtual Machine on your On-Premise Agent server. The process to do this will vary based on your operating system and deployment method. However, all methods require setting the JAVA_TOOL_OPTIONS environment variable to include the -Xmx flag with a value. The value for Xmx can be set to any gigabyte or megabyte value such as Xmx8g or Xmx512m. It is recommended to start with 4 GB and increase the value in 2 GB increments until your sync with Lumos does not produce a java.lang.OutOfMemoryError
Windows
To increase the heap memory limit for the JVM on windows, use the following command in an Administrator Powershell session: setx JAVA_TOOL_OPTIONS "-Xmx4g" /M. The value for Xmx can be set to any gigabyte or megabyte value such as Xmx8g or Xmx512m. It is recommended to start with 4 GB and increase the value in 2 GB increments until your sync with Lumos does not produce a java.lang.OutOfMemoryError
Docker/Linux
The method of increasing the heap memory limit for the JVM when using the docker On-Premise agent will depend on how you are deploying the container. Different deployment strategies will have different methods of setting the JAVA_TOOL_OPTIONS environment variable with the correct flag. If running the docker image from the CLI, include the flag -e JAVA_TOOL_OPTIONS='-Xmx4g' in your docker run command.